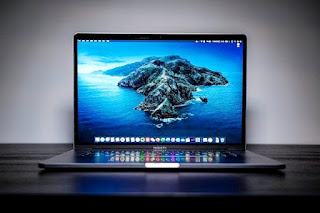
5 Ways to Take Screenshots on Macbook, Quick and Easy
For those of you MacBook users, of course, will feel more exclusive than using other types of laptops, one of which is because the system used is quite different. MacBook uses MacOs and other laptops, usually use Windows or Linux and several equivalent support systems. (5 Ways to Take Screenshots on Macbook, Quick and Easy)
The difference also makes the way to capture the screen or screenshot on the MacBook different. The following are a series of tips taken from the official website of the MacBook manufacturer, Apple, Support.apple.com: (5 Ways to Take Screenshots on Macbook)
1. Taking a Full Screenshot of MacBook
Now, you have to press and hold the Shift, Command, and 3 keys simultaneously. If you see a thumbnail in the corner of the captured screen, then click it to then edit the screen shot. You may also have to wait until the screen shot is saved on the desktop.
Shift+Command+3
2. Taking a Partial Screenshot
To get a partial screen capture, you start by pressing and holding the Shift, Command, and 4 keys simultaneously at a time. Then drag the viewfinder and select the area of the screen you want to capture.
To move the selected area, simply press and hold the space bar, while dragging the crosshairs pointer. If you want to cancel taking a screen shot, press the Esc (escape) key. And if taking a screen shot, release the mouse button or trackpad.
If you then see a thumbnail in the corner of the screen, click on it to edit the screen shot. After that, wait for the screen shot to be saved on the desktop.
Shift+Command+4
3. Taking a Screenshot of a Window or Menu
If you want to take a screenshot of a menu, you can start by opening the window or menu you want to take a screenshot of. Please press and hold the Shift, Command, 4, and Space bar keys simultaneously. The pointer changes to a camera icon. If you want to cancel taking a screen shot, press the Esc (escape) key.
Press or click the screenshot window or menu. To exclude the window shade from the screenshot, press and hold the Option key while clicking. If there are thumbnails in the corner of the screen, click and edit the screenshot, or perhaps wait until the screenshot has been saved on the desktop.
Shift+Command+4
4. Finding Screenshots on MacBook
By default, your screen shots will be saved on your desktop with the file title "Screen Shot [date] at [time].png".
In MacOs Mojave or later, you can change the default location where your screen shots are saved, from the options in the Screen Captures app. You can also drag thumbnails to a folder or document.
5. Further Alternative Information
Note that on MacOs Mojave or later, you can set a timer and choose where to save your screen shots in the Screen Captures app. To open the app, press and hold the Shift, Command, and 5 keys simultaneously.
Certain apps, such as Apple TV, may not allow taking screenshots of the window. If you want to copy the screen shot to the Clipboard, press and hold the Control key while taking a screenshot. Then you can paste the screen shot elsewhere.
You can also use the Universal Clipboard to paste the screenshot on other Apple devices. It's worth noting, however, if you're a recent MacBook user, that you can't go wrong when you want to capture the screen.
